PRODUCT UPLOAD METHODS
Method 1: List your product from already existing products on Jumia
Step 1: Log into Seller Center (https://sellercenter.jumia.com.ug/) with your registered email address and password
Step 2: Open a new tab and type in the Jumia homepage link (www.jumia.ug)
Step 3: Search for the product you want to sell in the search bar (www.jumia.ug)
Step 4: Pay attention to all the details and ensure you find a product with exact colour, design, logo, brand, image and other specifications
Step 5: Once you find the product, click on (Have one to sell? Click here to list your product)
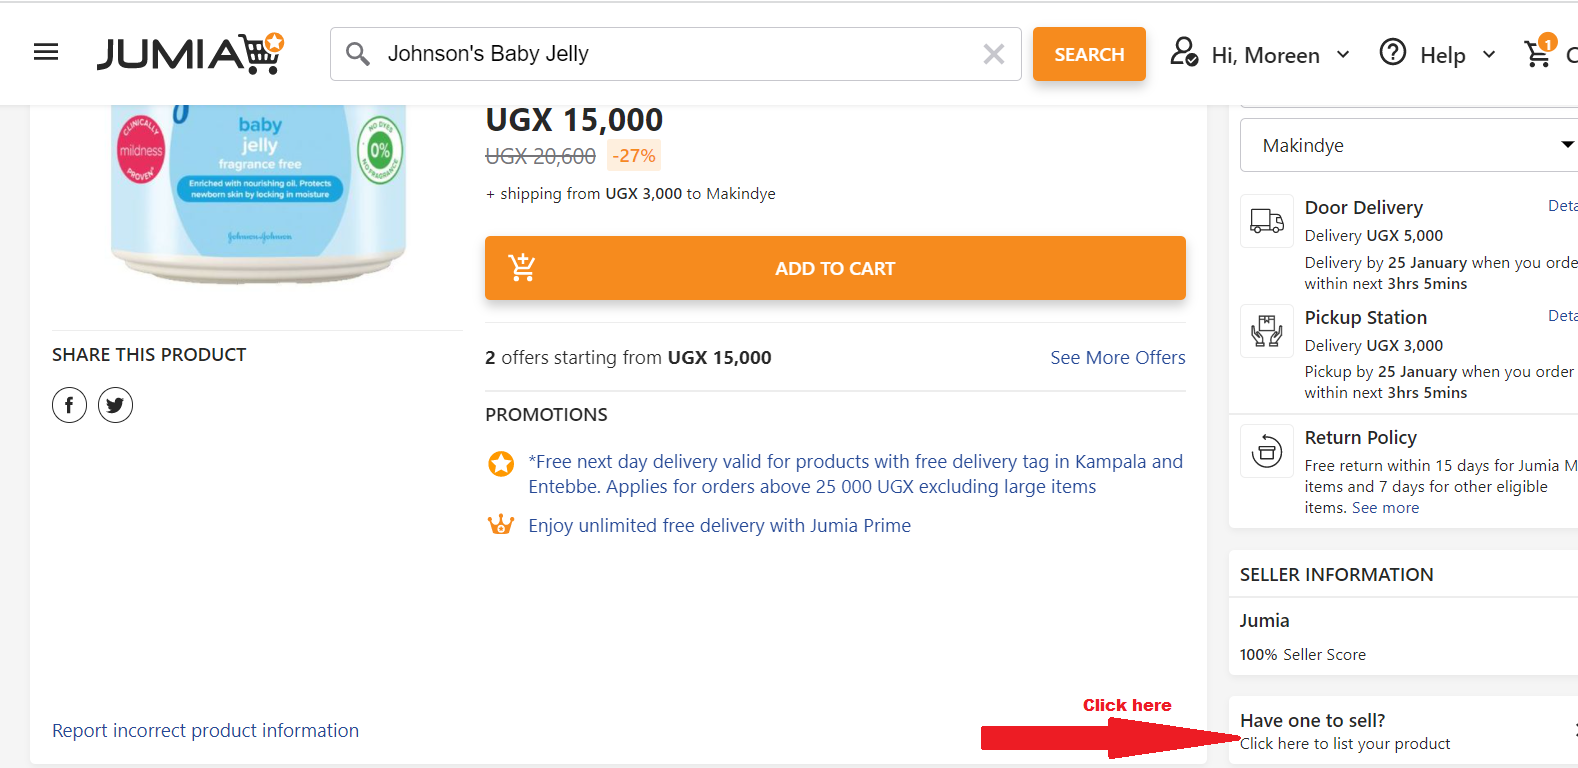
Every piece of information about that product will be automatically copied to your Seller Center page except the price.
Step 6: On the product pricing tab, you either see variation (for non-fashion items) or size (for fashion items). The field variation can be left blank; select the right size for fashion-related items.
Step 7: Enter your seller SKU (a unique code you generate yourself to help identify and differentiate products in your store. E.g CAM1001, MEX5002, IPH7SD).
Step 8a: Enter the quantity available and price per unit.
Step 8b: This is optional. Complete the sale price fields if you want to give a discount on the product. The sale price should be lower than the original price. Put in the start and end dates.

Step 9: Scroll down the page and click submit and finish

NB: All submitted products need to be reviewed for clarity and will be approved if it meets the quality standard.
Method 2: Create from Scratch
Step 1: Log into seller center (https://sellercenter.jumia.ug/) with your registered email address and password
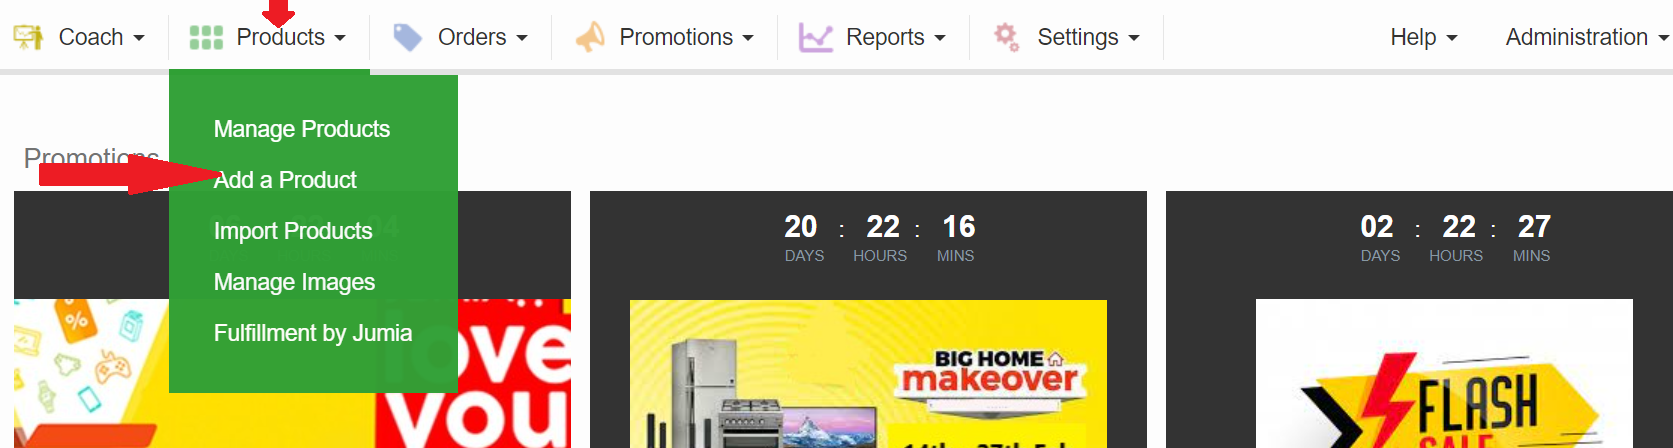
Step 2: Click on the products tab
Step 3: Click Add a Product
Step 4: Search or browse to find your product’s category, click on it and click select at the base of the page.

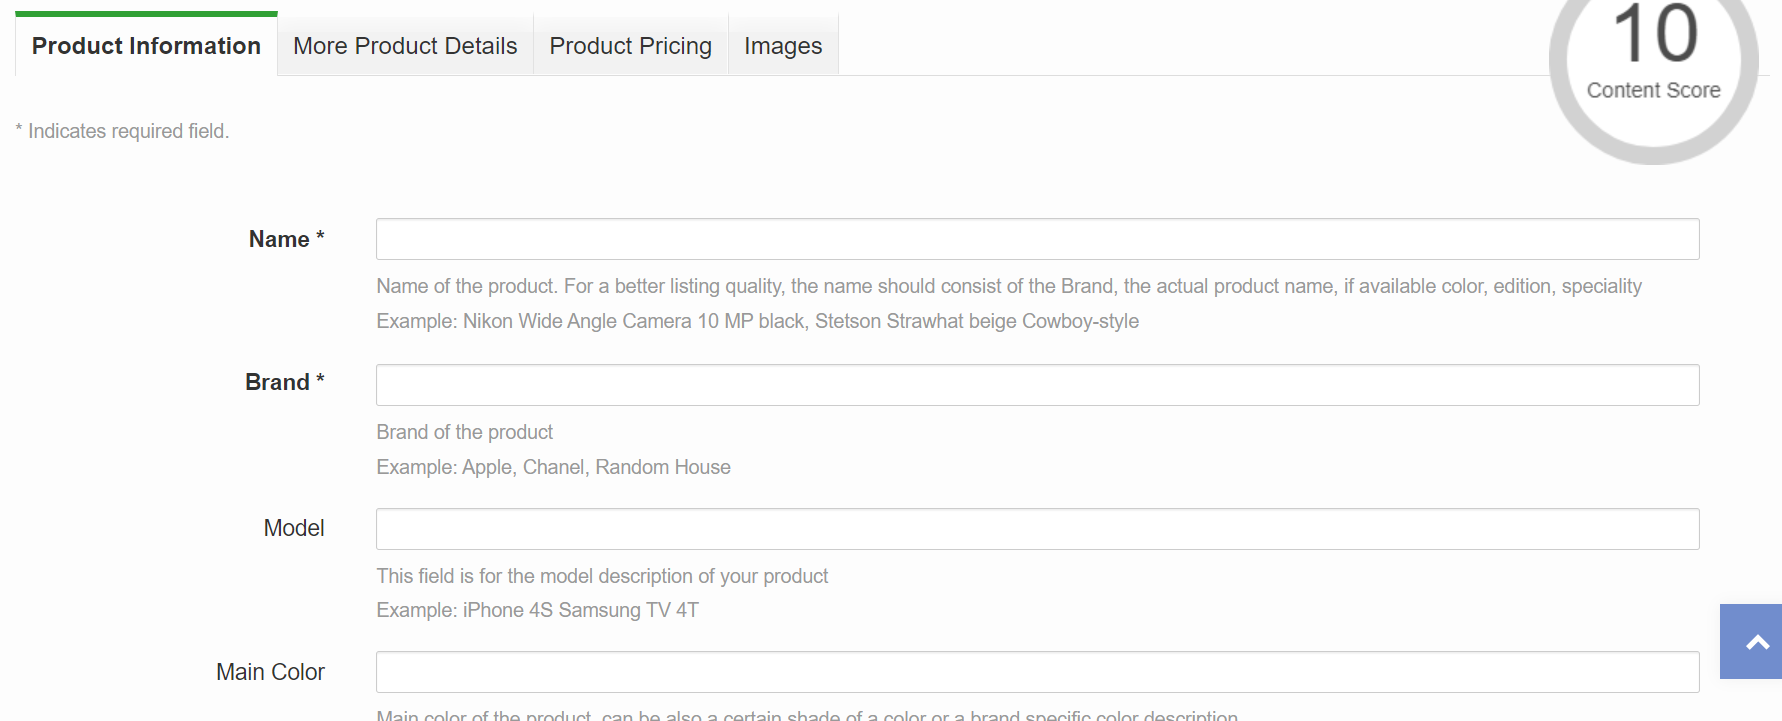
Step 5: Complete the fields Name, Brand, Model (if applicable) and Main Color. For products without actual brand names, use “Fashion” as brand name if the product is fashion related and use “Generic” if it’s not fashion related.
Find more information on how to create your content here
Step 6: Click Enter Product Details at the bottom of the page or Click on More product details
 Step 7: Complete the fields (with stars) especially Product Description, Highlight and Weight . Your highlight must be in bullet point and you should have a minimum of 5 bullet points about the product.
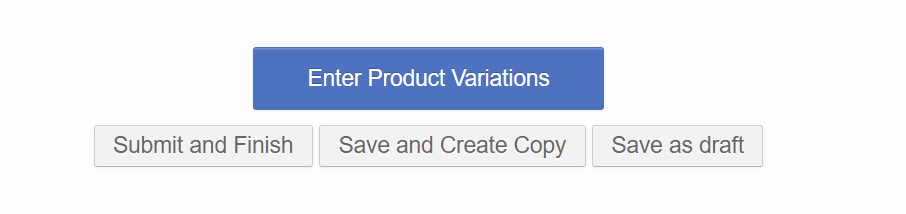
Step 8: Click enter product variations or click on Product pricing
 Step 9: On the product pricing tab, you either see variation (for non-fashion items) or size (for fashion items). The field variation can be left blank; select the right size for fashion-related items. Enter your seller SKU (a unique code you generate yourself to help identify and differentiate products in your store. E.g CAM1001, MEX5002, IPH7SD). Enter the quantity available and price per unit. The sales field is optional. Complete only if you want to give a discount on the product. The sale price should be lower than the original price. Put in the start and end dates.
Step 10: For products with multiple sizes, click Add another product variation and complete the new fields.

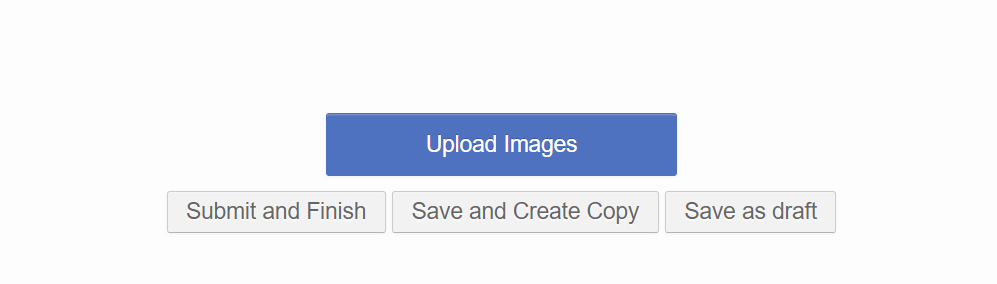
Step 11: Click Upload Images.
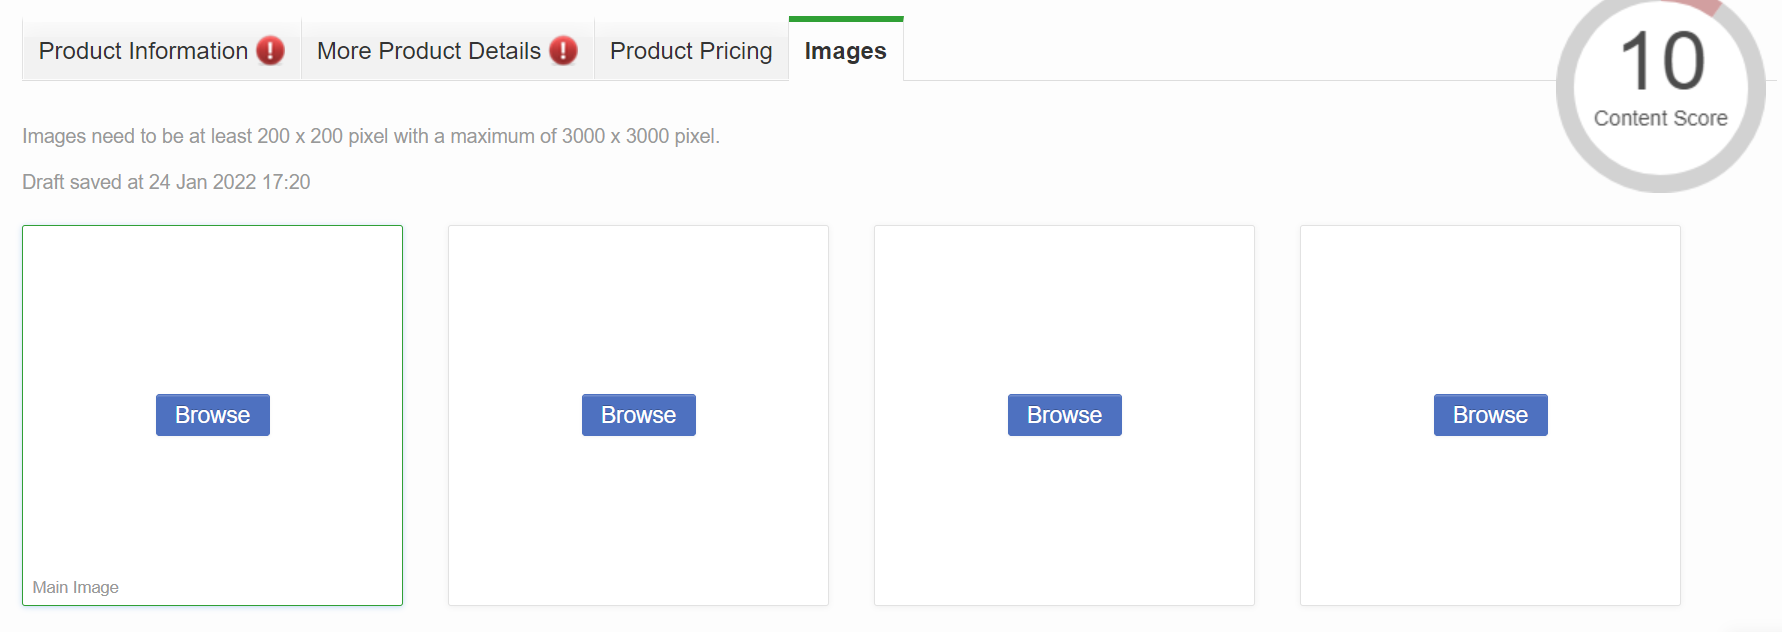
 Step 12: Click browse to upload your product images. Images should be a minimum of 200 x 200 pixels and a maximum of 2000 x 2000 pixels.
Note: Images should be clear, on a white background, without watermarks or writings on them.
Find more information on how to upload products, view details
Step 13: Click on submit and finish.
The product will be reviewed before it goes live within 48hrs.